Overview
There a lot of app on store with sharing photos with friends. Why not build your own Social app? Download this template, customize it and publish as your own.
Control with simple admin page and monetization the app through ads with analytics insights. As the console used Firebase, cheap (free, or basic is 25$ per month) and simple admin page. The database is real time, you can can see how users using your app, same as store high res images.
Thanks
Quick Setup
Fist step to build your service is with configuring backend where user data will be stored.
You app can be easily controlled from Google Firebase™. Please follow this link to read more about it https://firebase.google.com/docs/
- Users and content moderation
- Realtime data
- File storage
- Build-in Analytics
- AdMob configuration
- Low-cost host
Step 1 - Create New Project (Firebase Console)
It's time to add Firebase to your app. To do this you'll need a Firebase project and a Firebase configuration file for your app.
- Create a Firebase project in the Firebase console https://firebase.google.com/console and register first if needed, then click Create New Project button to create a project
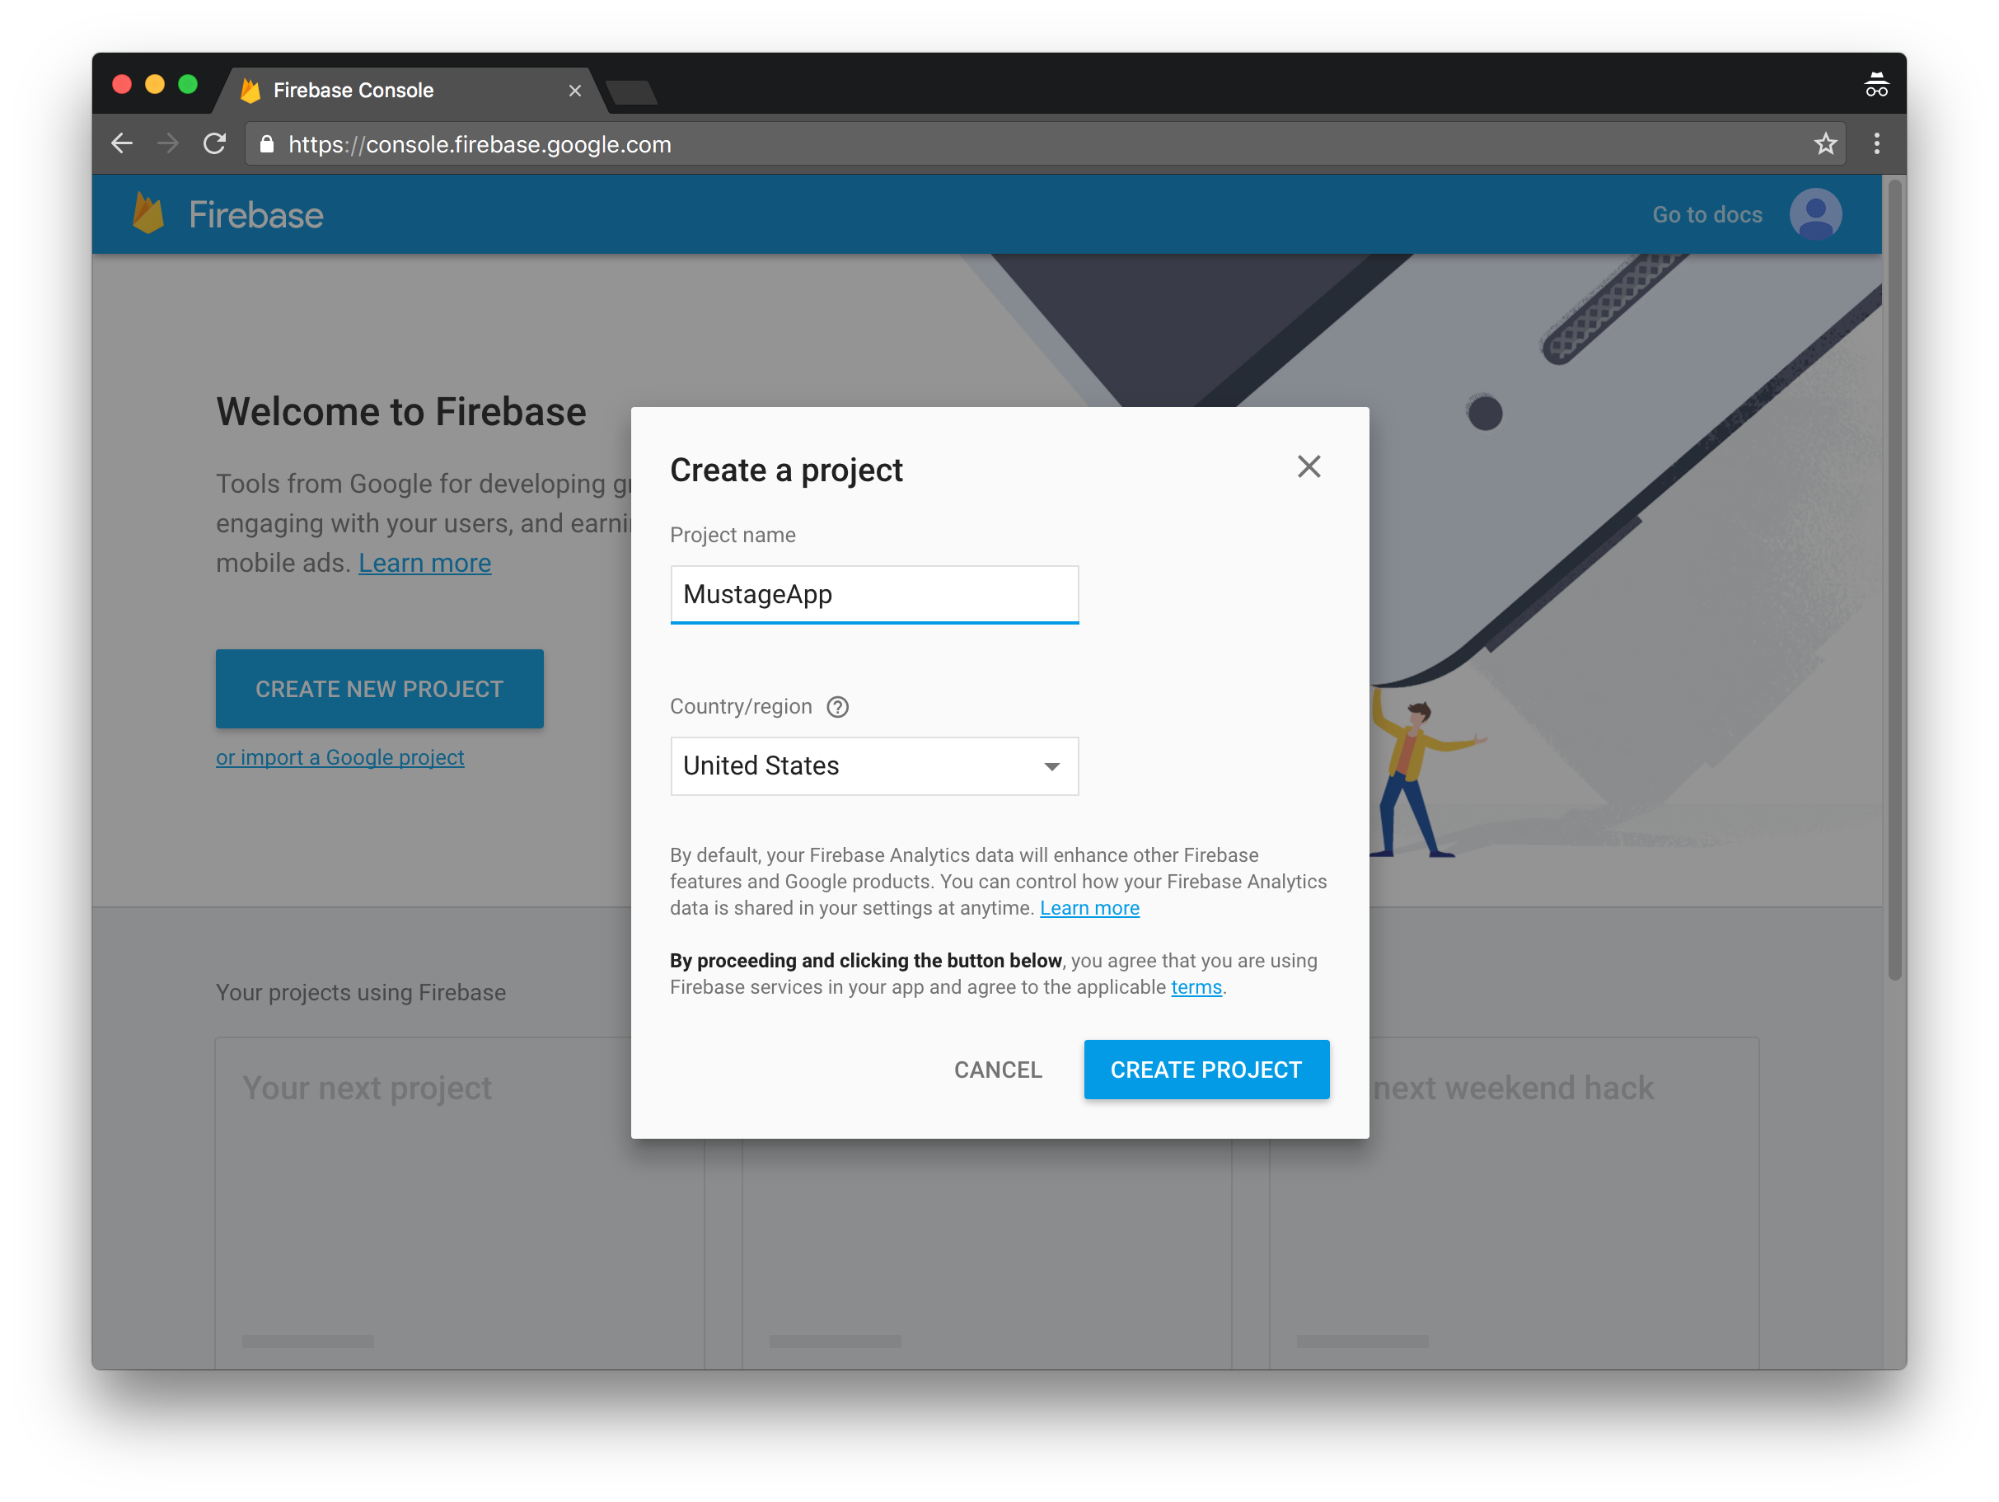
and give a name to your Project
-
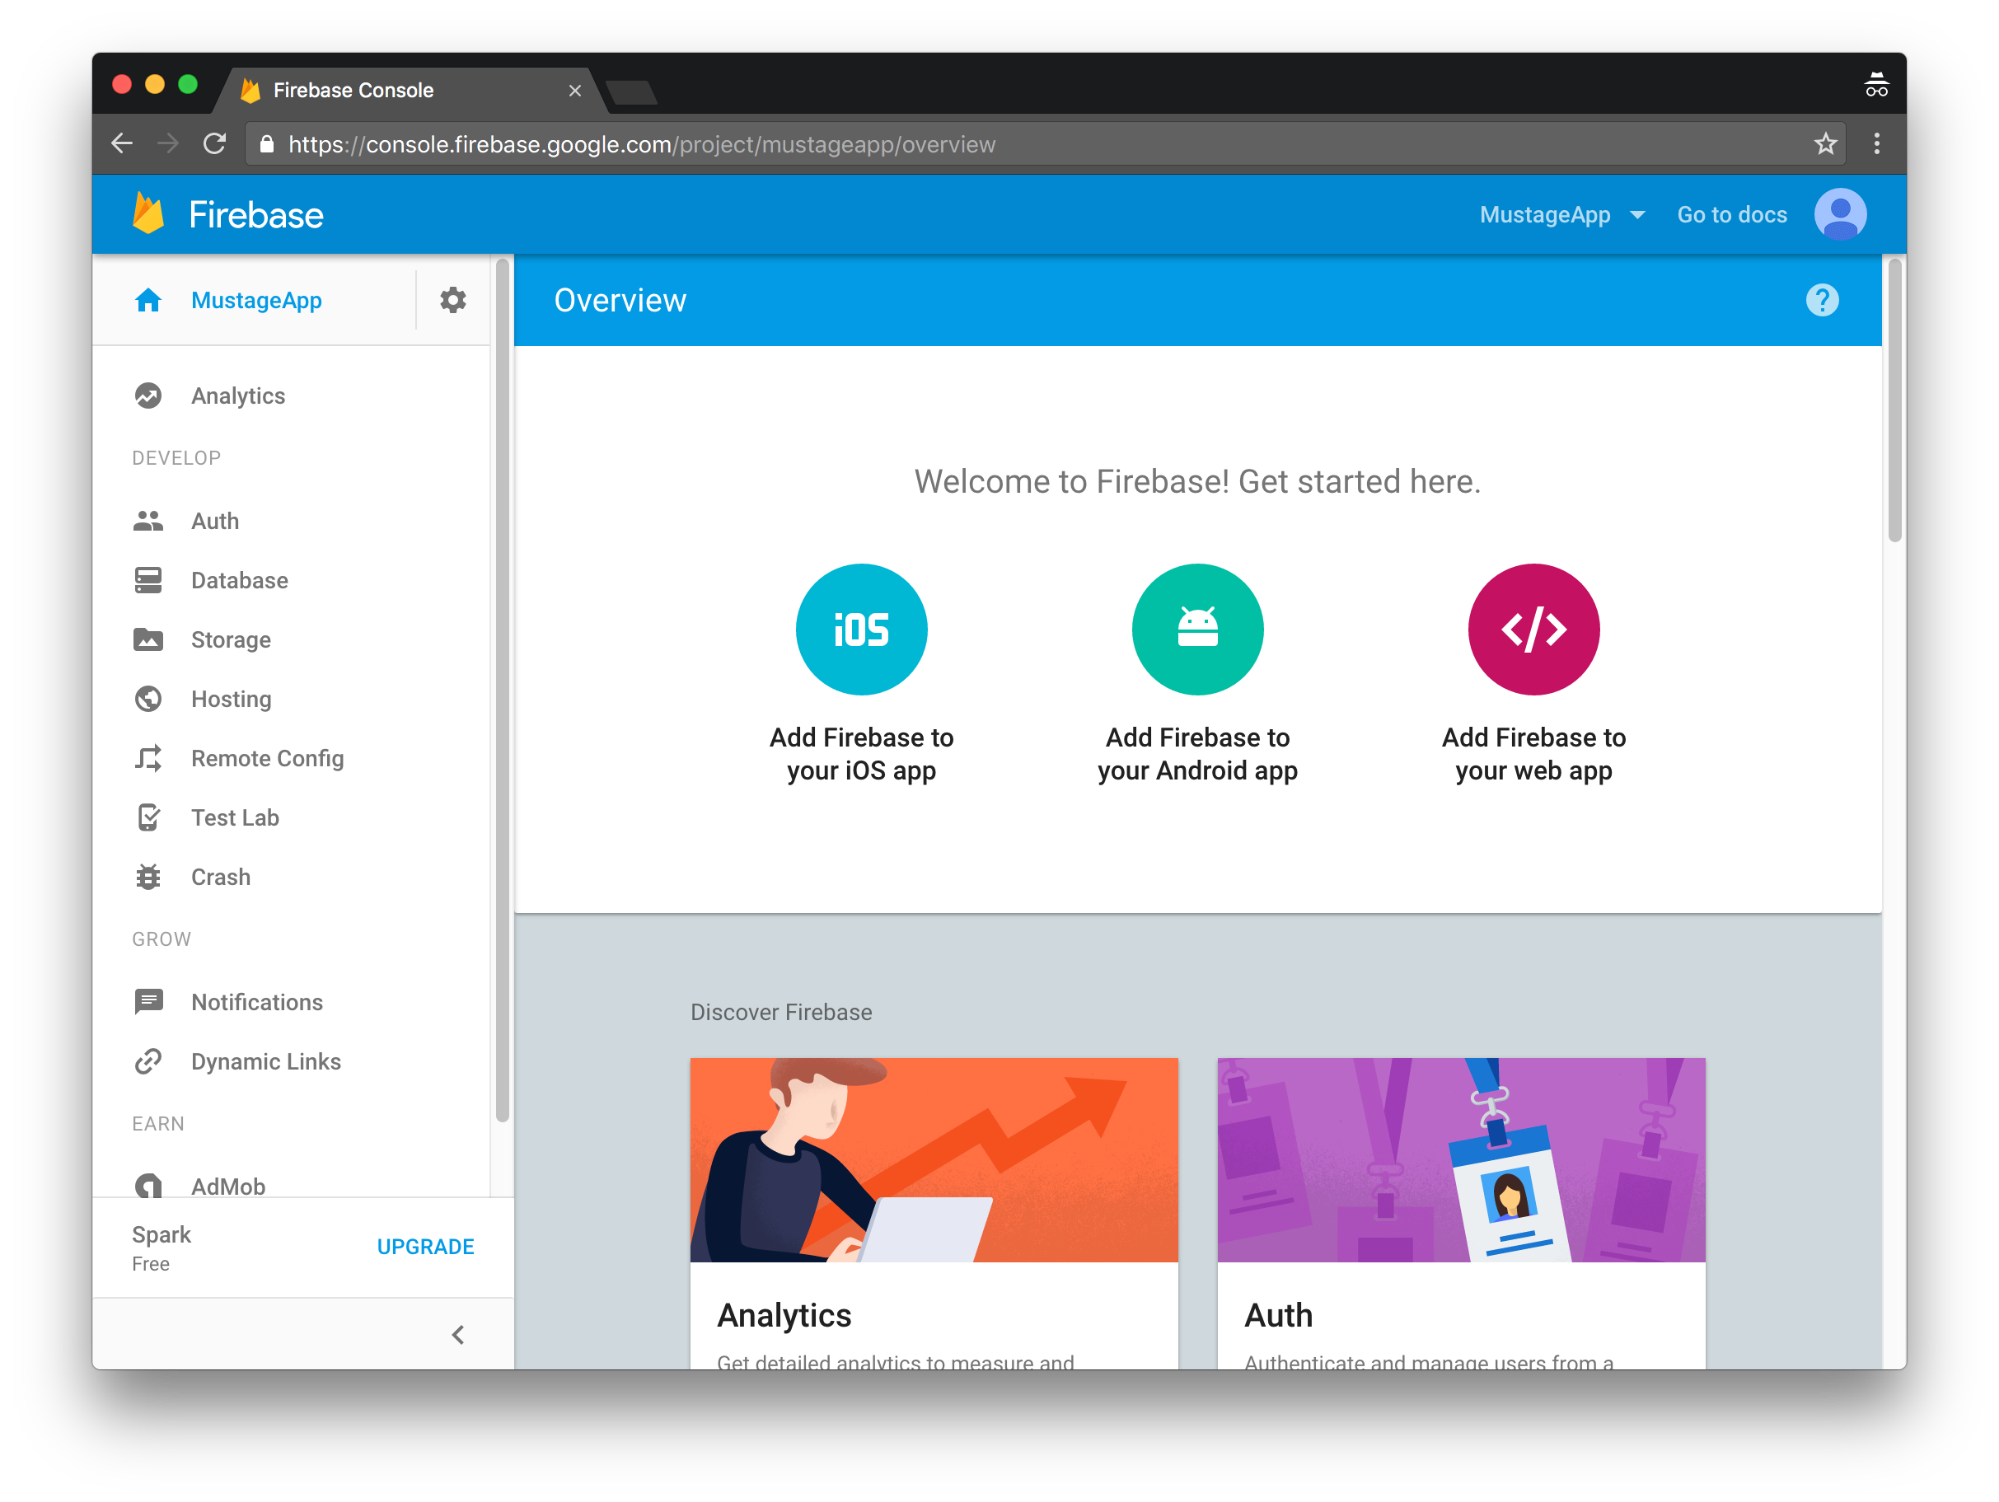
For iOS version, choose Add Firebase to your iOS app, for Android Add Firebase to your Android app and follow the setup steps.
-
When prompted, enter your app's bundle ID (keep it, because we need to setup it in app project) or Android package name for Android. It's important to enter the bundle ID or package name as it sets only once.
-
At the end, you'll download a GoogleService-Info.plist (iOS) and/or google-services.json(Android) file. You can download this file again at any time.
Step 2 - Authorizations Setup
Now, we need to enabled Sign-in providers, where you can find in Auth -> SIGN-IN METHOD. Currently application support only Email, Google and Facebook.
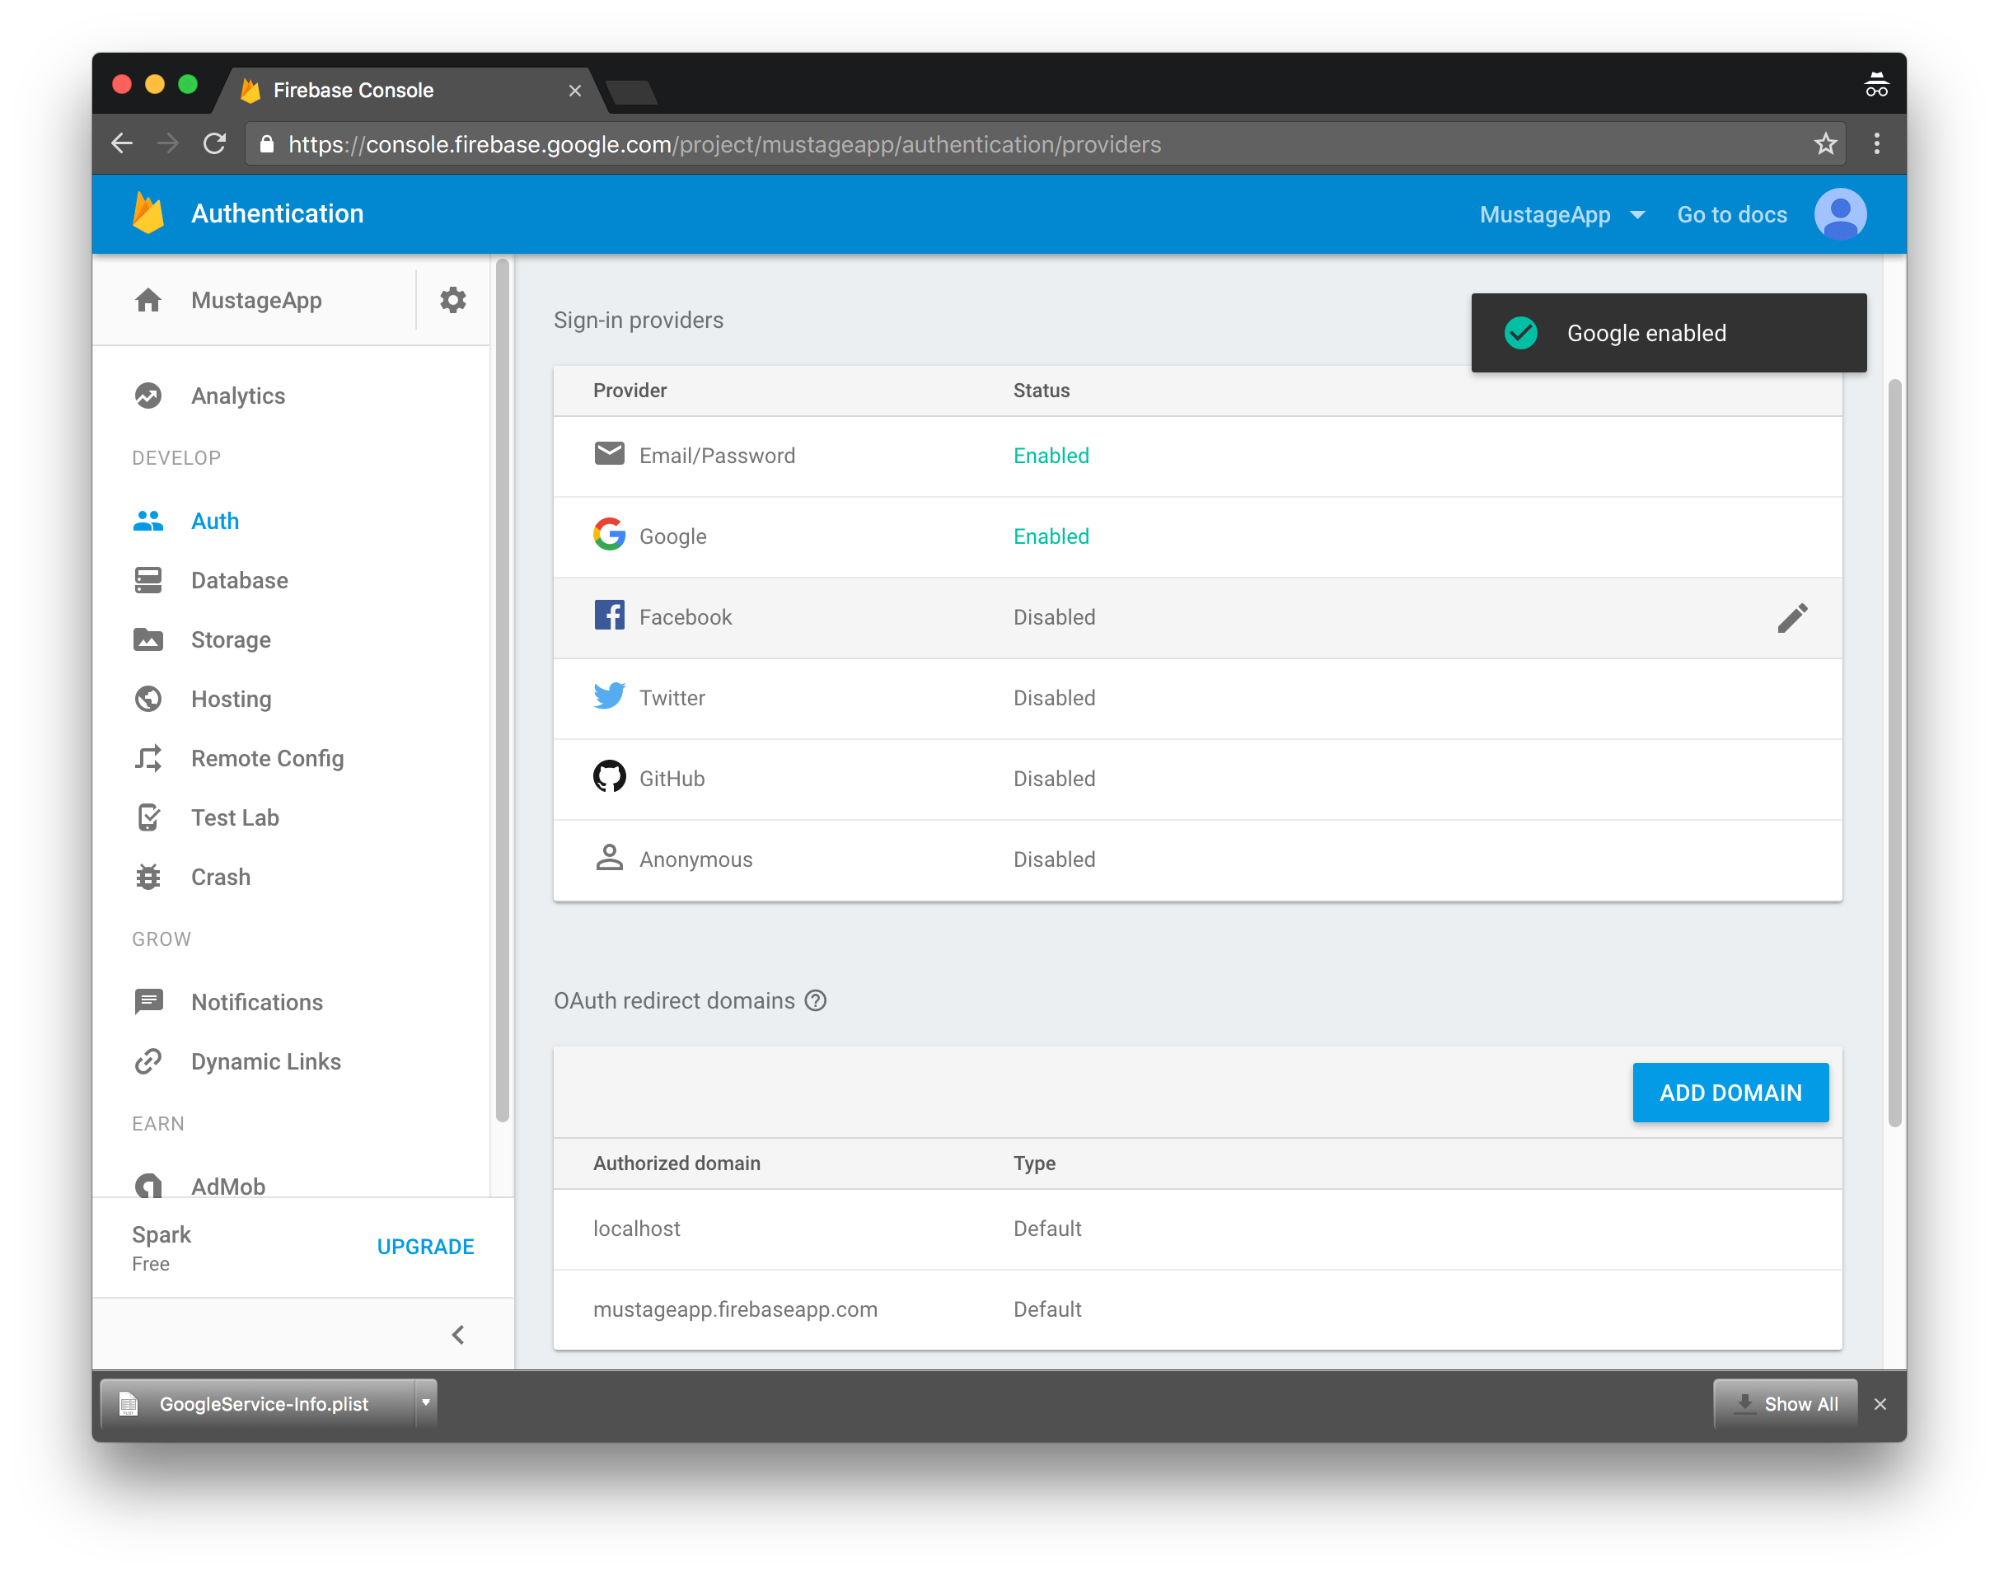
Some of provides will requier additional keys, secrets. Switch on/off provides and fill the required details.
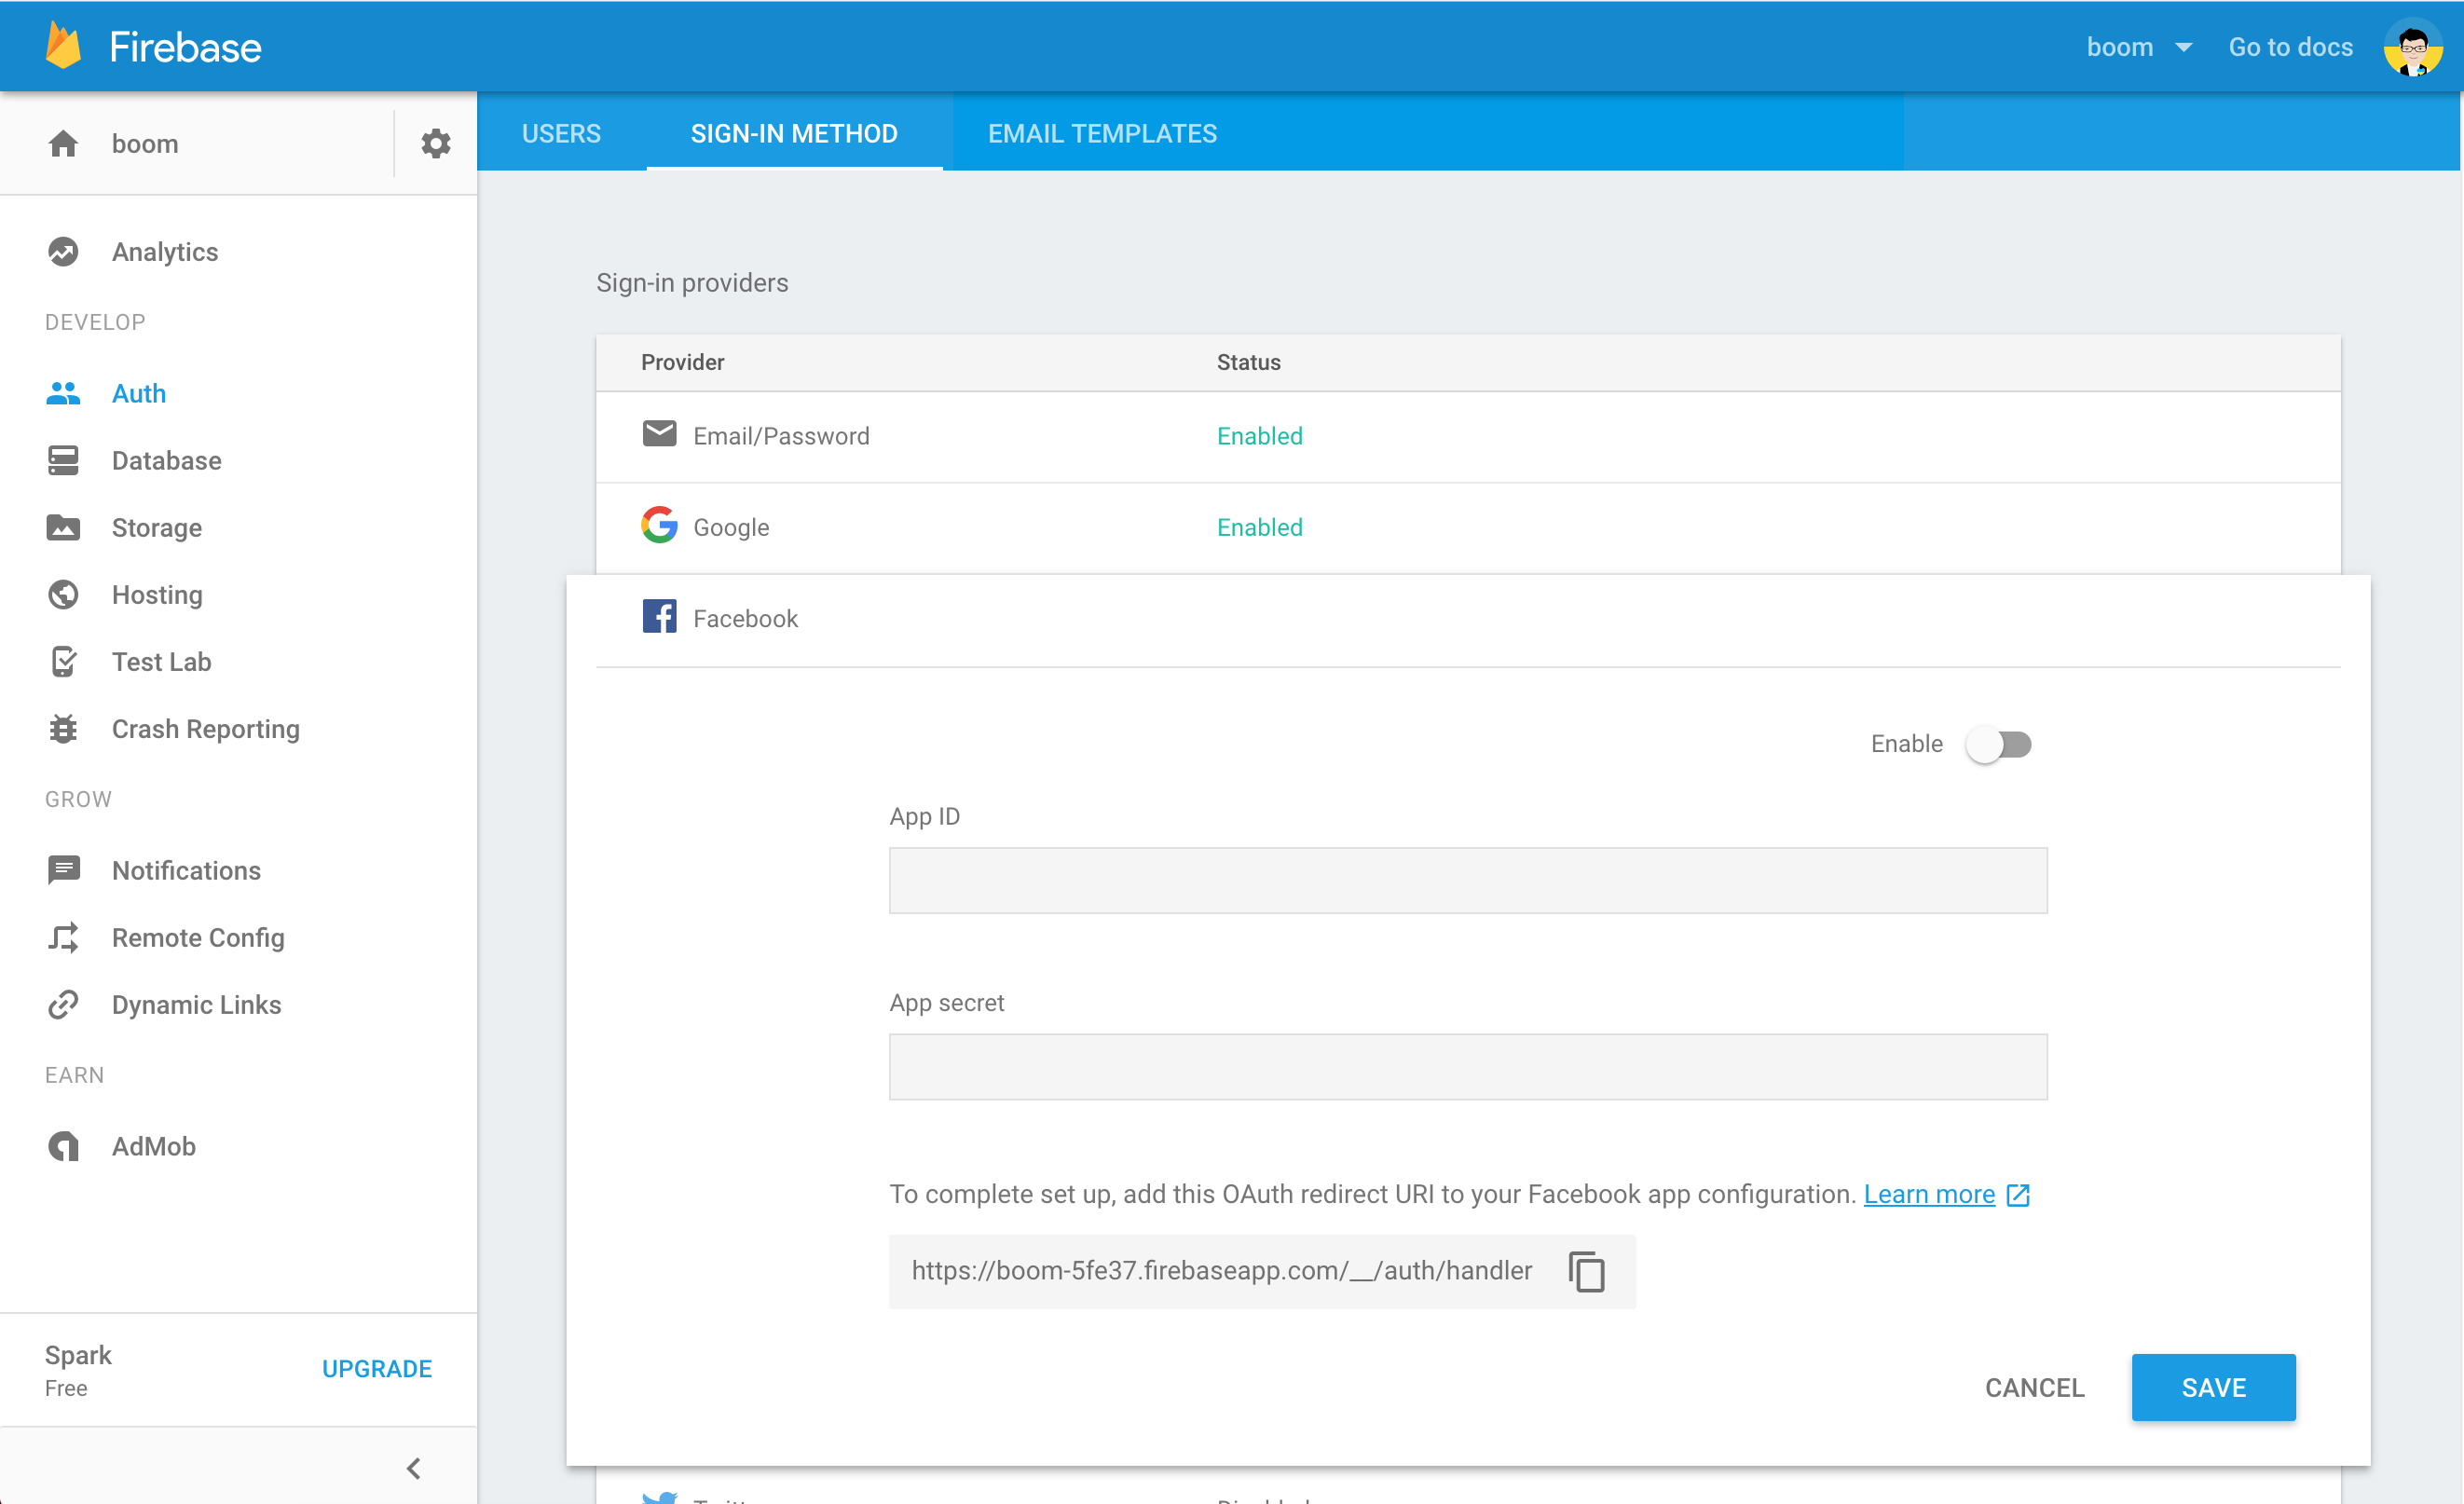
Don't forget to download config file again when you change the Auth Settings.
Step 3 - Enabled Database and Storage
Before setup the project you need to enable the services uses in the application.
-
Open Firebase Console and select your project
-
select Database in side menu and press Get Started to enabled Realtime Database - uses for storing all user data, comments and messages.
-
select Storage in side menu and press Get Started to enabled Media Storage - it uses to store all images and photos of the app
Firebase Storage uses rules to to configure max file size. Understand Firebase Security Rules for Cloud Storage. Currently max file size is limited to 200MB
rules_version = '2';
service firebase.storage {
  match /b/{bucket}/o {
    match /{allPaths=**} {
      allow read: if request.auth!=null;
      allow write: if request.resource.size < 200 * 1024 * 1024
    }
  }
}
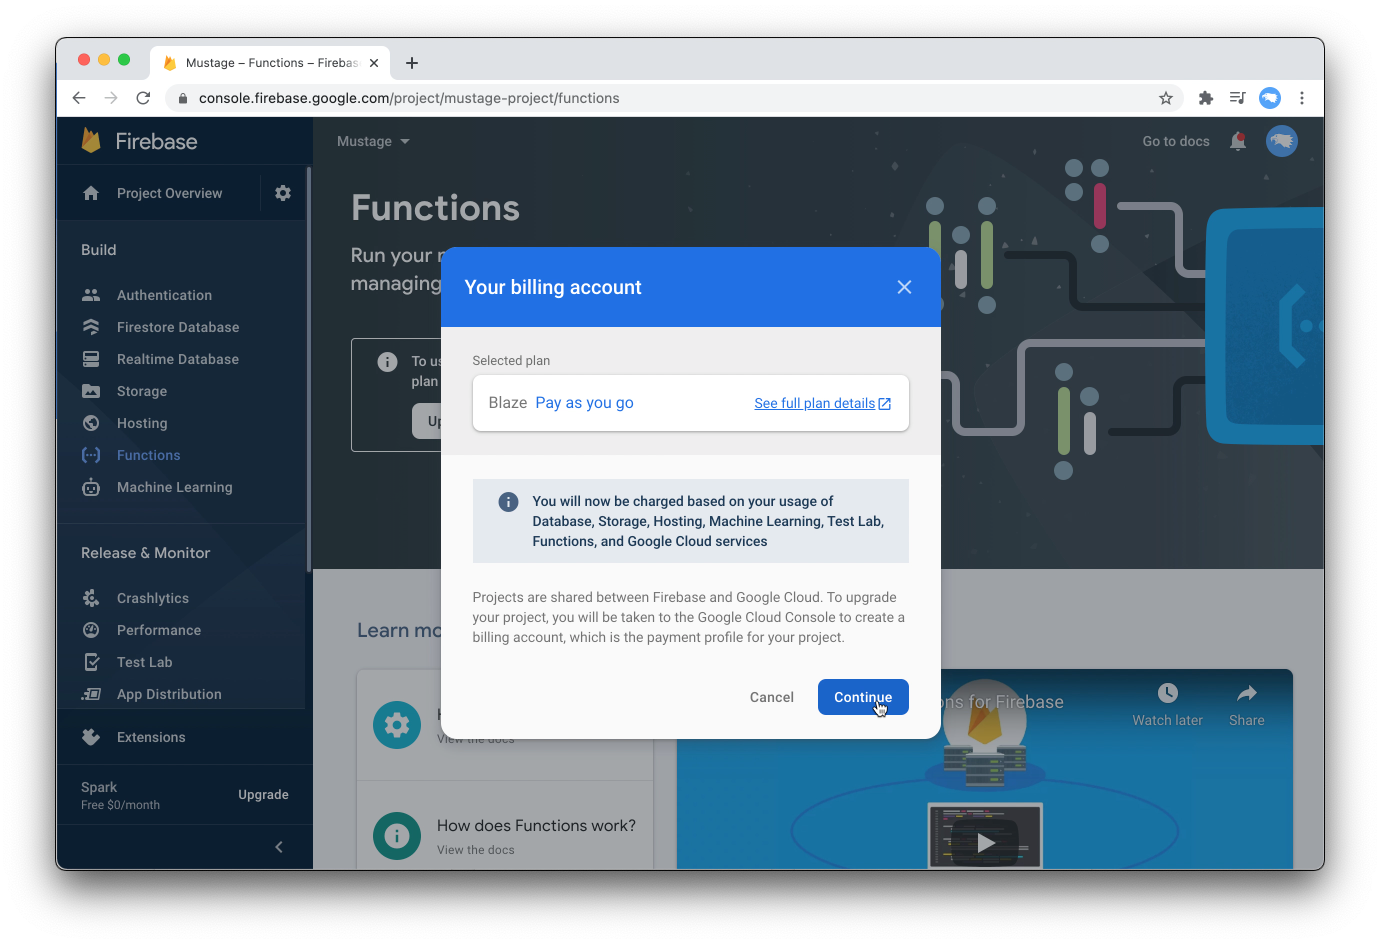
Step 4 - Enable Functions (important)
In order to make the app working be sure you enable Functions. You will need to upgrade your project to Blaze plan.
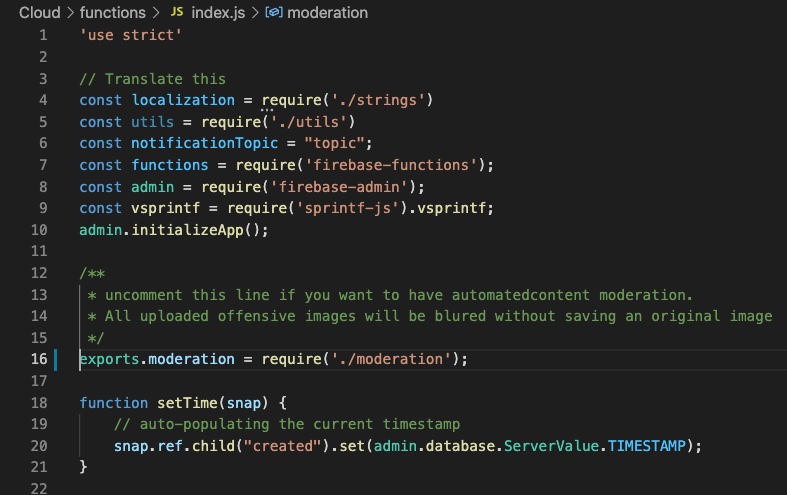
Step 5 - Content moderation (optional)
If you would like to have automatic content moderation enabled for your app, be you can enable it in cloud functions.
To do this open your Cloud/functions/index.js and uncomment line
Step 6 - Setup Cloud
For storing data and sending push notification Firebase CLoud Functions are used. It help to serve some automatical action that needs to be done out of application login, like sending push notification, generates user feed or count and rank stories.
Important! without cloud functions the app will not display content
Manually (Terminal)
-
Install the following tools before continue (all tools required):
- Firebase CLI - used to deploy cloud function and firebase configuration to admin panel
You can check if you have it installed by calling follow commands in Terminal
$ node -v
v.6.x.x
$ npm -v
6.x.x
$ firebase -V
3.18.x
if you have all this set, you can continue with the next steps
- Open Terminal in folder
/Cloud
** for Mac 2. and run command 'sh deploy.sh'
** for Windows
$ cd functions
$ npm install
$ cd ..
$ firebase login
$ firebase projects:list
# pick you project id and paste it in next command
$ firebase deploy --project <your project id>
after loggining with your Firebase account your functions will be delivered to server. To check if you have it please open https://console.firebase.google.com/, select the project and on left menu select Cloud Functions, you should see the list of functions.
If you have problem with deploying functions please try Docker-composer to deploy the functions. otherwise continue on Step 5
Using docker-composer
Be sure you have NodeJS and Firebase installed
$ node -v
v.6.x.x
$ npm -v
6.x.x
$ firebase -V
3.18.x
- If you have all tools installed, run the command
$ firebase login:ci
and copy token into docker-composer.yaml and also replace the PROJECT_ID, that you can find on https://console.firebase.google.com/ in Project Settings
- install Docker-Composer which you can download & install from here.
- open Terminal in /Cloud folder
- and call the command
$ docker-compose up
Step 7 - Setup Applications
You can use now both platform connected to same firebase project, just download GoogleService-Info.plist (iOS) and google-services.json(Android) file.
Pick your template and setup your application:
-
if you have Android template continue with Setup Android Application
-
if you have iPhone template continue with Setup iPhone Application